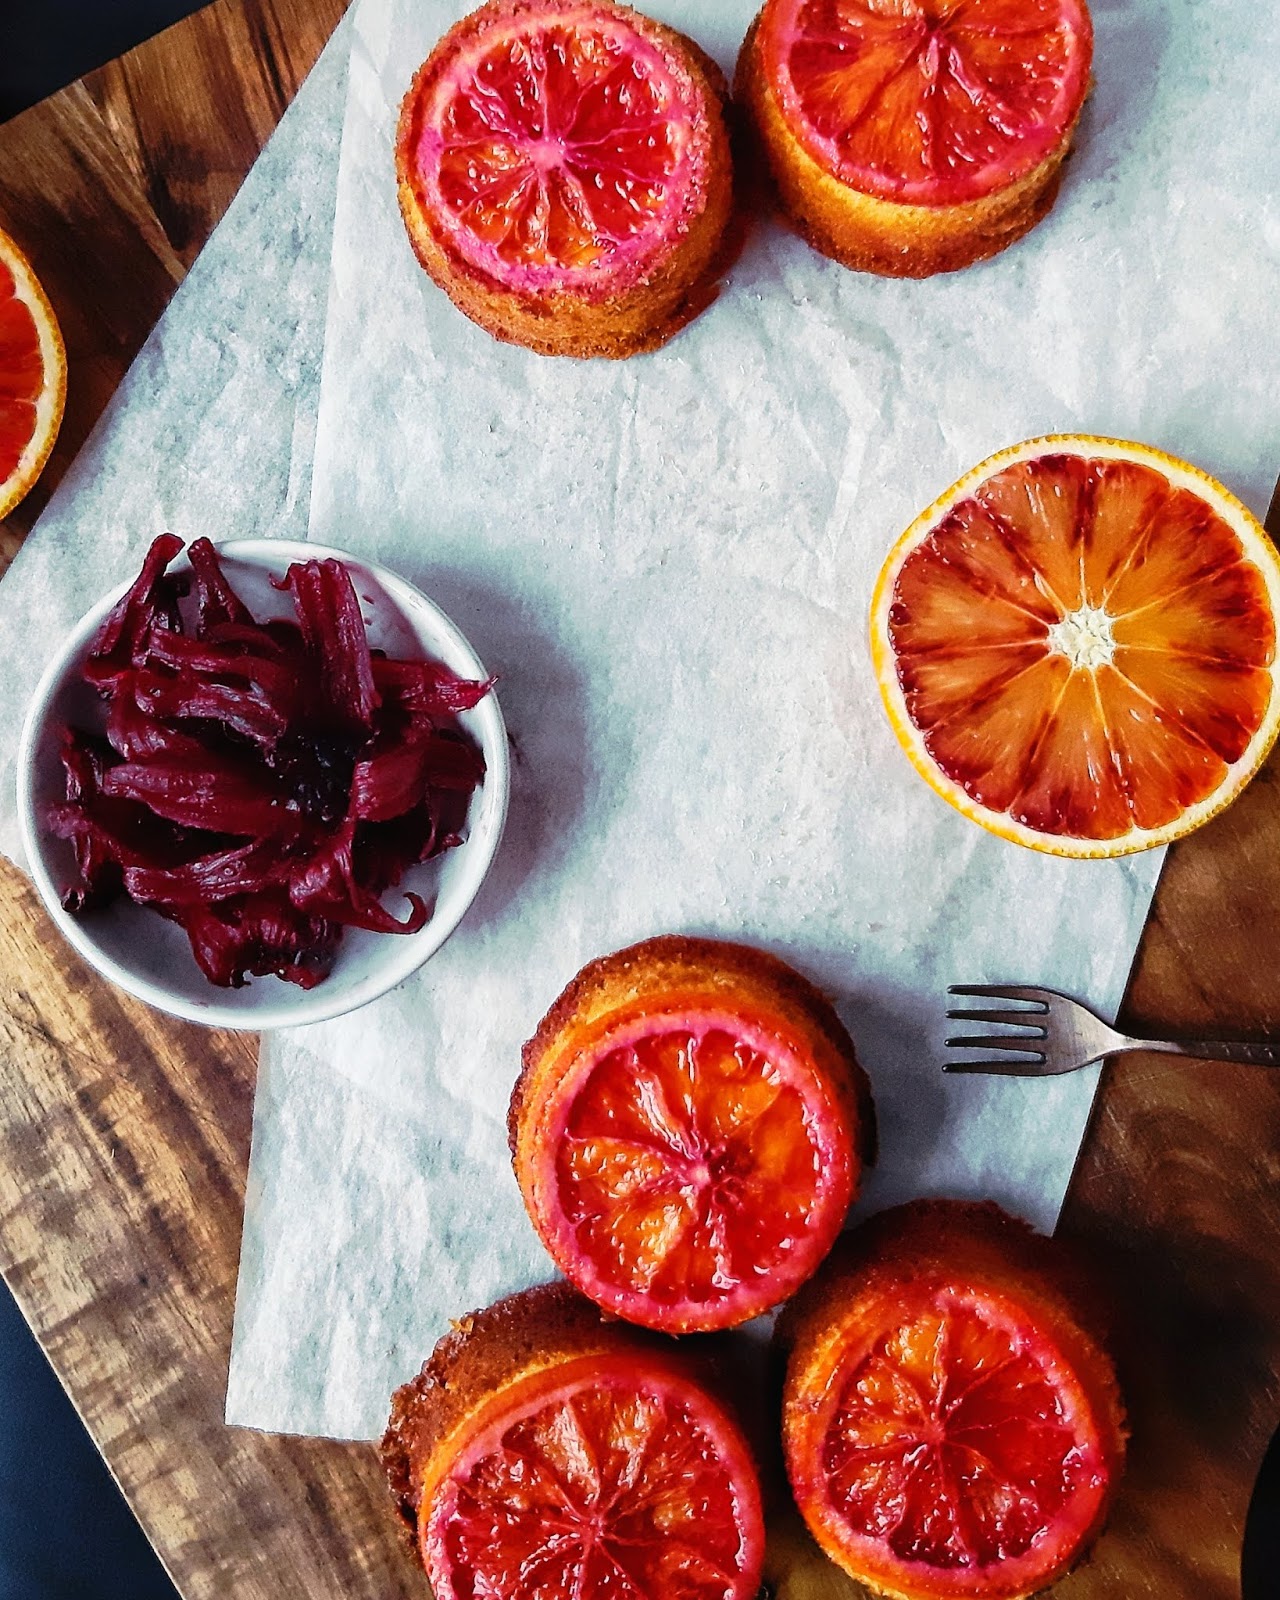
Upside Down Blood Orange, Hibiscus and Polenta Cakes
Blood Oranges are in season for such a short period of time, you only find them in the green grocers and markets (you don't tend to see them in the supermarkets) between January and March but it is one of my favourite fruits. The name may sound a bit grisly but the fruit is sweet, tart and beautifully coloured. They are smaller than the average orange and you will generally see a reddish blush to the skin. Inside the flesh can range from having a red streaking to being completely blood red but this can often depend on when the oranges were harvested and their particular variety. The flavour is unsurprisingly that of orange but with red berry notes, namely that of raspberry. The deeper the red colour of the flesh of the blood orange the more pronounced the berry like 'blood orange' flavour and the more delicious the fruit!
If you are interested in the sciencey bit the red 'blood' colour is caused by anthocyanins which is a type of antioxidant pigment found in plants and of course if you Google this you will see lots of hype of their health benefits.

I was first introduced to Blood Oranges when I worked at the restaurant at the Theatre Royal in Newcastle where we made a Blood Orange Creme Caramel. The best way to appreciate a Blood Orange I feel is when you can see how beautiful the fruit is as well as savouring it's delicious flavour. My feed on Instagram had been scattered with images of Blood Orange upside down cakes but after making so many large cakes in December and January I was in the mood for something smaller and more bite size.
At Christmas I received a loose bottomed non stick muffin tin which I think is one of the best inventions known to man. The holes have straight sides so essentially what it gives you is a perfect mini cake. I had been dying for an excuse to use it and I finally had my inspiration. If like me you only have one tin you will have to cook the cakes in two batches as this recipe is enough batter for around 20-24 individual cakes. You could also make two 7 inch cakes, just remember to adjust the cooking time - they will take around 30-35 minutes. Or you could make one batch of individual cakes and one 7 inch cake. The choice is yours!!

The cake recipe is an adaptation of a dairy and gluten free cake that is an old favourite of mine but that was based on ground almonds. It is a beautiful cake but ground almonds are not a cheap ingredient and I wanted a way to make the cake more affordable without compromising on flavour and remaining gluten and dairy free. The answer was to use polenta, or cornmeal. This may seem unusual but it is a traditional ingredient in the Italian cake 'Amor Polenta' which is often flavoured with citrus zest or with an anise liqueur and is enjoyed equally as a dessert with poached fruit, an afternoon snack or as breakfast with an espresso.
Another ingredient you may be unfamiliar with in this cake is hibiscus. Hibiscus is a flower that you may have seen in upmarket bars where a whole flower (dried or preserved in syrup) is placed in a champagne flute and when the champagne is poured over the flower blossoms or you may have drank it in a fruit tea. It has a flavour that is a cross somewhere between raspberry and cranberry and gives whatever you put it in a beautiful crimson pink colour. The flavour really complements that of the Blood Orange and the natural colouring that the hibiscus gives you also enhances that of the blood orange because unfortunately you are not guaranteed the ruby red flesh in every blood orange. You can find the flowers in syrup or dried in some shops and online and they are relatively inexpensive. In this recipe I have used the dried. The best thing is that you can use the flowers again in a syrup or a tea when you have used them for this recipe.
This cake is soft, dense and crumbly but deliciously moist and zingy with addition of the Blood Orange and Hibiscus Syrup. Believe me when I say you can't have too much of this syrup. The cake just soaks it all up and when you cut into the cakes it is so lovely to see the pink blush staining the crumb.
The hibiscus glaze on the top is the finishing touch that adds that beautiful alluring colour and shine to the cakes that says 'Hey come eat me!'.

UPSIDE DOWN BLOOD ORANGE, HIBISCUS AND POLENTA CAKES
Makes 24 (or 2 x 7" cakes)
Ingredients
Cakes
4 Eggs
160g Caster Sugar
110g Sunflower Oil
100g Ground Almonds
150g Polenta
1tsp Baking Powder
1 Lemon, zest and juice
2 Blood Oranges, zest and juice (total juice should be approx 100ml)
1½ Blood Oranges, thinly sliced into discs (ideally 2/3mm thick)
160g Caster Sugar
110g Sunflower Oil
100g Ground Almonds
150g Polenta
1tsp Baking Powder
1 Lemon, zest and juice
2 Blood Oranges, zest and juice (total juice should be approx 100ml)
1½ Blood Oranges, thinly sliced into discs (ideally 2/3mm thick)
Blood Orange Syrup
55g Caster Sugar
5g Hibiscus
200ml Blood Orange Juice
5g Hibiscus
200ml Blood Orange Juice
Hibiscus Glaze
50g Caster Sugar
50g Water
5g Hibiscus
50g Caster Sugar
50g Water
5g Hibiscus
- Preheat oven to 170°c and grease cake tin/s with oil.
- Put a slice of blood orange into the bottom of each muffin cavity. If the slices are too big cut from the centre to the edge on one side and this will allow you to fold it over itself so it sits snugly in the bottom. Set the tin/s to one side.
- Put the eggs and sugar in the bowl of your stand mixer with the whisk attachment and whisk on medium/high speed until light and fluffy.
- Reduce the speed to medium and slowly drizzle in the oil with the whisk running. You should have a light airy mix. Once it has been incorporated add the dry ingredients in 2 or 3 batches on a slow speed, mixing until they are just combined - you don't want to knock the air out of mix.
- Lastly drizzle in the blood orange juice and mix until combined.
- Pour cake mixture into a jug and stir well so that you have an even mixture. Pour into the prepared cake tins to a couple of mm below the rim. If you have only one muffin tin set the rest of the mixture to one side.
- Bake in the pre-heated oven for 15-20 minutes if making mini cakes, or 30-35 minutes if making 7" cakes, or until a skewer inserted into the cakes comes out clean.
- Whilst the cake is baking prepare the syrup. Put all the ingredients into a pan and heat until the sugar has dissolved.
- Strain the syrup and set to one side. You can use the same hibiscus to make the glaze. Place in a new pan with the sugar and water. Bring to a simmer and reduce until bubbling and thickened.
- Remove the hibiscus. You can keep this to be steeped as a tea if you wish.
- When the cakes are ready remove from the oven and place the tin on a cooling rack. Leave the cakes in the tin and stab each cake a dozen or so times with a skewer.
- Spoon a couple of spoonfuls of the blood orange syrup over each cake (if using the muffin tins. the larger cakes will require a larger amount of the syrup) and allow to soak in. If you still have mixture left over remember to leave enough syrup for the next batch of cakes.
- Before the cakes have completely cooled remove from the tin by loosening round the edge with a knife and pushing the cakes up and free. If you are using a traditional muffin tin then loosen and simply turn out.
- Turn the cakes over so that the slice of orange is now at the top. Spoon or brush over the hibiscus glaze trying to keep it just on the orange.
- If you have left over cake mixture was the tin, grease it again and repeat the process with the remaining mixture.
- These cakes keep well at room temperature, covered with cling film, for 3-5 days or longer in the fridge. They are delicious served alone with a cup of tea or with a spoonful of Greek yogurt as a light dessert.

For more images of my cooking adventures and sneak peaks of what's to come on the blog follow me on Instagram @_cooknoevil_
Comments
Post a Comment